Outputting Data to Snowflake; Comparative Methods with Alteryx
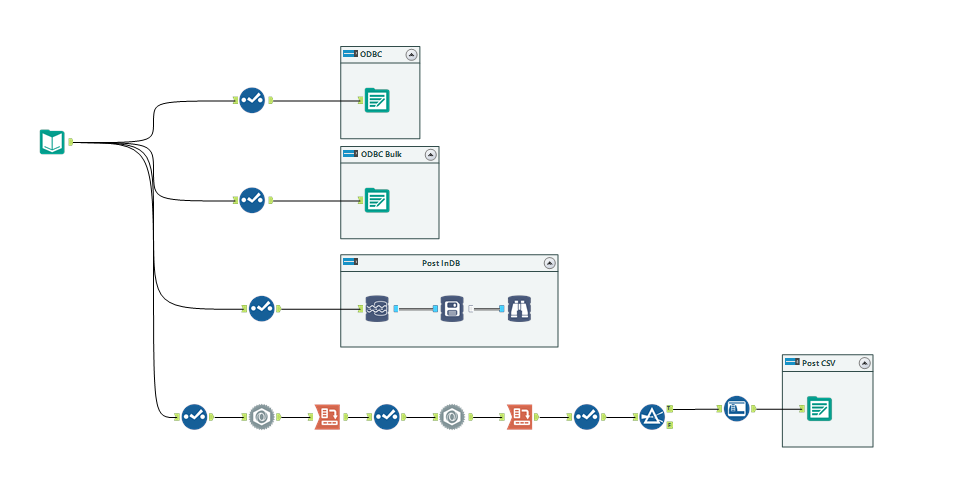
My firm have recently signed up with Snowflake, so on a spare afternoon I decided to compare the different ways you can connect data to Snowflake from Alteryx. I'm doing this with some Kickstarter data I found on data.world; I'm breaking the data down into four tables, and writing each table with a different method.
The ODBC connector using a regular output tool
(note: both Snowflake and Alteryx do not recommend this for large data operations)
Using Alteryx's regular output tool, I've connected with a standard ODBC connection for Snowflake to ingest my "summary information" table, which is a load of rows with summary Kickstarter project information on. I had set up the connection as a DSN on my computer during the internal training we had, so I just reused that.
Pro: didn't really have to think much about setting it up after the first time.
Con: the ODBC driver writes one record at a time, so twenty thousand records and 11 fields took twenty minutes. It is not a fast way of doing things; I'm uploading a lot of rows from a flat file perspective, but dust from a Big Data perspective, and this took a while. There must be a better way....
The ODBC Bulk Loader, using a regular output tool
Other members of my firm encountered this problem early on and shortly discovered the bulk loader connection. As the name suggests, this is meant to be faster than the regular ODBC connection and is designed for bulk inputs, like I'm doing here. The original ODBC input works one line at a time, but the bulk loader stages it before contacting the database.
When I selected the bulk loader and brought up the below interface, I thought it was important to remember two things - you can select "local" for staging if you don't have an AWS bucket lying about, and you can still use Pre and Post SQL statements in the output tool.

Pro: Yes, definitely faster. This was the same number of rows (but only 5 columns) and took 5.1 seconds.
Con: remembering that it is there in the first place.
This is actually the second resort of Snowflake and Alteryx's recommendations. The first is our quiet and weird cousin, the In-DB tools.
Stream and Write with the In-DB tools
Alteryx + Snowflake's documentation for working together recommends getting to the InDB tools as fast/as much as possible. This effectively shifts the "thought" of the process onto the DB and therefore onto Snowflake's warehouse, which makes sense in an enterprise environment. But I'm just loading in data? How does it help me?
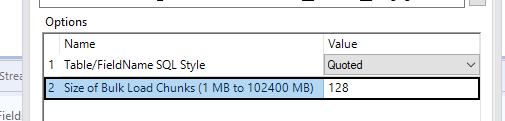
When configuring the InDB tools to stream the data out and write it to the database, the first thing I have to configure relates to the right InDB connections - and the write string defaults to the bulk loader, so you don't have to think about picking the right one. It also makes the option to change the data chunk size much clearer as well.
Pro: Super speedy to write - this took about 6 seconds, which was creating a temp table and then creating the real table.
Con: I tend to configure my computer DSNs with only the mandatory parameters (e.g. no database or schema) and then configure them in the tools I use at the time. The InDB tools were not a massive fan of this method and means I changed the configuration of my DSNs a few times to ensure it wrote the table to the right place.
Output with excel, and then upload
Of course, the last of all last resorts. Sometimes you have to do things the manual way, so let's see how it goes. I have a table of web assets for the Kickstarter projects which also need to be uploaded to Snowflake. Snowflakes manual file upload service can take standard flat files (csv, json and the like), but nothing as jazzy as an excel file.
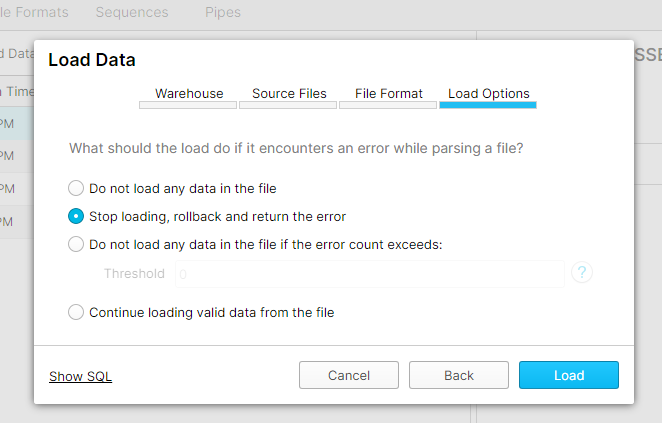
My last component of the data is some supplementary information which was encoded in a JSON format in the data. Unaltered, this comes to about 174mb as a csv file (which is too large for Snowflake), so reformatted the data into a simple structure (loading JSONs will be for another time!). To load the data, you must create the table first, and then the "load data" option will become available on the Tables tool bar. Specify a schema and what it should do in the face of errors, and that's it.
Only in my case, that wasn't it. There was a lot of trial and error going on on my part to understand the limitations of flat file upload, such that I've concluded the best configurations for me were a pipe delimited file with UTF-8 encoding. I also couldn't find the file size limits within Snowflake's documentation very easily, such that my knowledge on this is "more than 5mb but less than 174mb", which isn't particularly fine tuned. In a way though, I think it's good that uploading data as a flat file isn't too easy, because ideally we shouldn't just be throwing tables at the database and seeing what sticks.
Pros: straight forward process
Cons: actually quite fiddly in some of the parameters.
To conclude, the best method for posting data to Snowflake is the bulk loader, whether using InDB or regular output tools. Use other methods at your peril!